I like to receive the printed circuit board of a study. This makes tangible what was then only a concept :
lundi 10 mai 2021
jeudi 29 avril 2021
µPF--2 : Final Beta Version
By reworking the layout of the components, I finally had enough room to implement all of the extension connector signals. All I have to do now is to create the printed circuit board:
Eventually, I hope to be able to operate these various original expansion boards knowing that they are intended for a µPF1P and not a µPF1 or 1B :
 |
| Printer & I/O boards. |
Interesting informations on this subject are available on this site: https://fjkraan.home.xs4all.nl/comp/mpf1/
jeudi 22 avril 2021
µPF--2 : Finally it should look like this!
As I mentioned in a previous post, it is not always easy to arbitrate between the capacities of a system and the difficulty of its material realization, especially if in addition the final price must be as tight as possible.
For this uPF--2 I considered several possibilities before arriving at a system which I believe to be sufficiently simple but efficient for the envisaged use.
Here in 3D what should look like the system :
Due to the FPGA used, I reduced the expansion bus to only addressing peripherals. This should be more than enough to create I / O expansion boards of all kinds.
 |
| http://www.kswichit.com/Z80/Z80.html |
mercredi 14 avril 2021
µPF--2 : Argh!!!
Studying an electronic board is, like many things, a matter of compromise. You have to make a choice between what you want to offer, the complexity of the schematic, and ultimately, the material feasibility.
The result of my previous study resulted in a fairly complex system. In fact, too complex for this type of subject. So I decided to deport all the FPGA part on a pre-fabricated board.
This brings as a result not only that the most delicate parts of the study are now on a circuit very easy to integrate, but in addition, offers a higher end FPGA. This still greatly simplifies the final board.
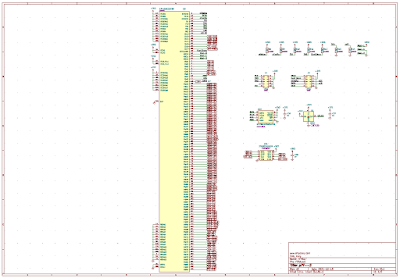
The result is now much simpler:
mardi 30 mars 2021
RETRO COMPUTING : THE FOENIX BOARD
You know what? This morning the postman had a little surprise from Canada for me:
A new type of processor board specially developed for retro-computing, based on the WDC65C816S @ 14MHz processor and with at least 2MBytes of system RAM. Interesting isn't it?
It only remains to learn how to use it to develop interesting applications. Admit that this type of system is still more 'fun' than the endless and practically all identical boards on which the same Linux has been running for over 20 years!
lundi 22 mars 2021
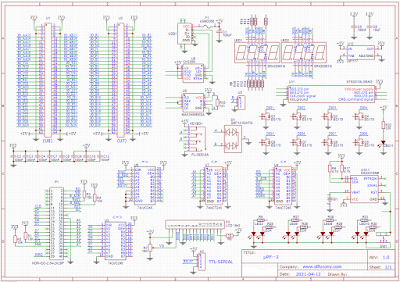
uPF--2 : Beginning of electronic board design.
After having worked on several personal electronic boards as well as on the reissue of microcomputers, I can finally start designing my personal FPGA board.
This is a minimal system intended to replace the Z80 µPF--1 compatible development kit that I have mentioned several times on this blog.
The diagram looks something like this:
mercredi 17 mars 2021
OMEGA MSX COMPUTER : FIRST START
As I mentioned in my previous post, this computer is not very difficult to assemble for those who have decent experience in this type of work. In fact, the hardest part is getting all the components. At one point, we still come to the end of this quest:
The 'only' component that is missing is the battery. But Cbios (MSX compatible) can do without it. The first start using a laboratory power supply with controlled intensity allowed me to avoid the 'magic smoke'!
And voilà :
The message is clear, the system is now waiting for an application cartridge. Note that I did not mount the keyboard proposed by the designer of this system. Standard USB keyboards are much less expensive. I intend instead to develop an interface allowing the use of a commercial keyboard on this computer.
There is therefore still a little work to be done to be able to use this MSX computer in a comfortable way, but the basic system is operational. This is a very good start. Well done to the designer of this Omega!


