mercredi 6 décembre 2023

A flash cartridge downloadable from USB, a few days later.

As I indicated in my previous post, I had almost reached the end of creating my USB downloadable cartridge, but unfortunately, the USB protocol generates periodic activity on the USB bus, which is disrupts operation of my cartridge. This involves unplugging the USB cable once the download is complete. This was not the objective that I had set for myself, namely to leave the cartridge connected to the PC while being used in an MSX computer.

So I had to find a solution. In fact it is very simple, use two processors on the card. The first manages USB communication, the second manages loading the cartridge and providing data to the MSX bus.

Yes, two processors. As the entire software aspect is already developed, all I will have to do is manage the communication between these two processors to finalize the project. As in any case the cost of the additional processor is comparable to that of a DIP FLASH, this solution is not that 'absurd'.

And the result of my thoughts is this:


I must say that the result is quite clean. I still have to check the placement of the notches because on the previous version, I realized that the insertion into the case was slightly forcing.

Ah yes, I also added the possibility of choosing the slot in which this cartridge should operate. Like this, the 'concept' is complete.

vendredi 1 décembre 2023

A flash cartridge downloadable from USB.

Everyone knows the cartridge system of microcomputers from the 80s. The MSX, a machine from that era, is no exception to the rule.

When you don't know anything about this type of machine, and when you finally get one, the first thing that comes to your mind is to see how it works. And so to do this, insert a cartridge, if possible of games, obviously!


This is when the problems start. How to do today when MSX has been commercially dead for more than 30 years. How to find such cartridges. It is of course possible to find them on the second-hand market. But buying 10 cartridges to test 10 games, well, that's not really viable.

The idea came very quickly to see if it was not possible to have a cartridge that could be refilled on demand, by SD card or USB device.

The Carnivore 2 cartridge, which also offers extras, uses a FLASH card to operate. You have to be able to find a compatible flash card, which is not always easy. I was never able to use the one I bought. The FPGA was poorly soldered and the cartridge quickly became unstable.


Straight into the trash :-(

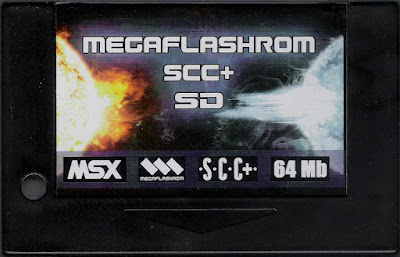
There is the MegaFlashROM_SCC+_SD. It's the only one I managed to use. But to use it, there is a whole procedure to follow which is boring. And if you don't do this every day, you will have to find the documentation each time to successfully re-initialize the cartridge and copy your new game into it. The least we can say is that this solution is not practical at all. In addition, you have to use utilities that are provided in the cartridge while understanding what you are doing. And when you don't know anything about MSX, it's not engaging!


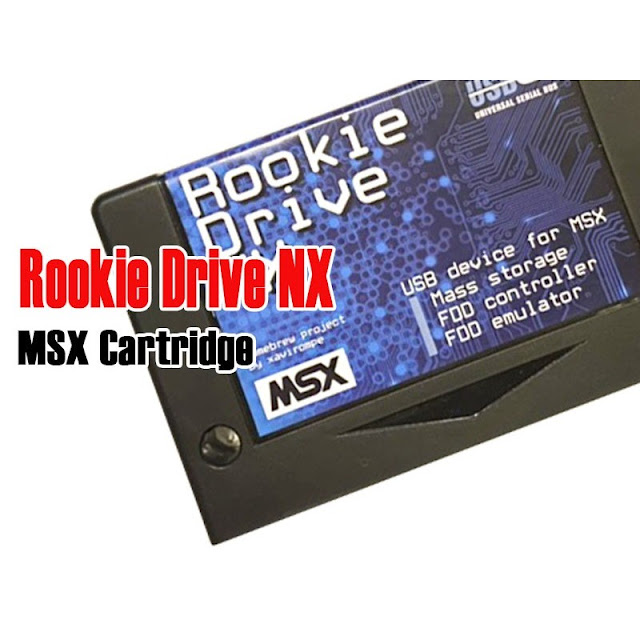
There is also the solution using a USB device like a key. For this, the rookie-drive-nx cartridge seems ideal. But also, after reading the documentation, I have never been able to get a USB device to be accepted by this cartridge: frustrating.


There is also the SD 512 but given the price of my three previous purchases, I decided I was going to discontinue the charges. So I haven't tested it.


Because, in fact, my goal was to test as easily as possible an MSX board that I had just built, Sergey Kiselev's OMEGA computer.


I had been dying to get my Omega board working for a while now. Because I don't want to spend more on a specific keyboard, I took the time to develop a USB keyboard converter to the OMEGA computer. 


I have also made the result of my work freely available on Github at this address: https://github.com/sillycony/USB-keyboard-to-OMEGA-converter.

So... I was looking for a solution to make this machine execute something in a simple way. This is how the idea of ​​creating a cartridge that can be downloaded via USB came to me.

I don't know if this is the easiest solution at the moment because I'm in the design phase and it's not yet finished despite several previous prototypes.

But I know that once finished, the cartridge will be very easy to use. Simply insert it into the cartridge port of the MSX machine while also connecting it to the USB port of your PC. Dragging and dropping your binary file onto the cartridge, which will be seen as a USB key, will be enough to make the ROM for the MSX available in a few seconds.

If the final solution for my cartridge is not ready yet, I am posting about it now because I have almost achieved what I wanted.


But why is the current beta version not satisfactory?

Well it's very simple: because the USB protocol imposes regular requests from the host to the device to check its proper functioning. And it happens every few seconds.

And? Well, the response process requires the processor on the cartridge to respond ;-). And that takes time. Even if the processor used is fast, while it responds to the USB request, it cannot respond to computer access via the cartridge bus. Result: the MSX computer crashes! But, when the USB cable is unplugged, everything works as expected, as shown in the picture above.

I even planned the automatic RESET of the MSX computer while loading a new binary, so that it then restarts on its own on the new game, or new application. It works very well.

I therefore need to dissociate the USB bus management function from that of the MSX bus management. Because I don't use a FLASH strictly speaking, but the flash contained inside the processor. 'Small capacity' flashes in DIP housing and parallel addressing are becoming more and more difficult to find and more and more expensive. 

So I don't have this problem with a processor equipped with the desired amount of Flash. In addition, it makes routing the printed circuit easier.

The final cartridge diagram looks like this:


I know, it's difficult to read. It's just a screenshot. But we can notice two big circuits there. These are the two processors used. The one on the right is in charge of the USB port, the one on the left is in charge of storing the binary of the cartridge and presenting it to the MSX bus. 

This will cost a little more to produce than expected, but as the two processors are the same models, I will be able to take advantage of the quantity order to reduce the final price.

The software is ready and validated. All I have to do is implement each processor with its part and add a small communication protocol between them. The most 'tricky' part consists of creating a new printed circuit board with more components. But I think I can use the design of the current cartridge to facilitate this new implementation.

I must say that this is now the second project that I have carried out with a professional type process with all that this implies of prototyping, extensive testing taking into consideration a whole bunch of parameters including price, ease of realization, reliability etc etc...

I must say that it is a very enriching experience... When I think of what the type of job I had at the French university was, just a few months ago... What mediocrity!

mardi 14 novembre 2023

UTC1122, AUTOMATION, RETRO COMUTING, MINIMAL COMPUTING.


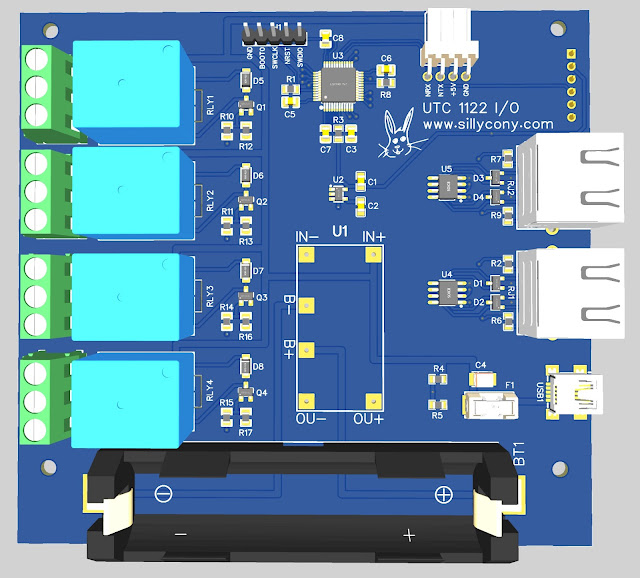
Some improvements to the device's I/O circuit board. I also added a precision clock. I'm thinking of modifying the main clock program to use this precision clock.


mardi 7 novembre 2023

Doing retro-computing is so much more fun!

 In 2022 one of my projects consisted of placing a Micro-Professor clone entirely in an FPGA.

For this project, I created an external mechanical keyboard. Because the original membrane keyboard did not seem at all effective for working intensively with the machine. I know something about it, I learned the Z80 assembler on the 1P version in 1987. Memories...


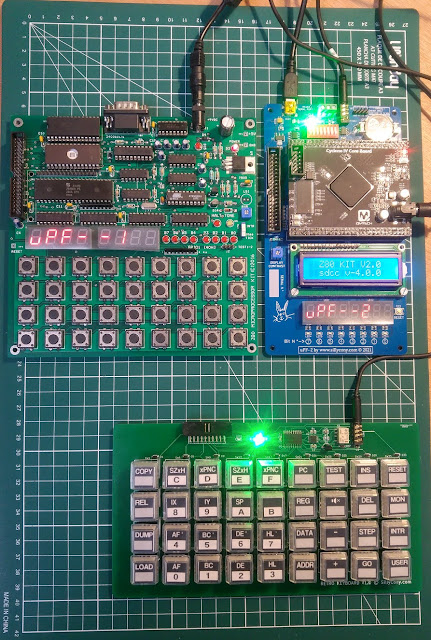
The keyboard, along with Wichit Sirichote's version of the mPF1 and my FPGA version.

After publishing information on my FPGA version on the network, and after receiving some comments, especially about the keyboard, I decided to build a new version of it. This time with a processor that is easier to handle, a RISC-V in this case.

This is what it should look like:


This new keyboard will not be dedicated to a particular hardware type. It will provide its data in standard serial form but in RS485. This is to allow a certain immunity to noise as well as possible positioning quite far from the device to which it will be connected.

Another thought on the Microprofessor: When I had made my version, and knowing that I implemented a USB/serial link allowing the program to be loaded at high speed, I quickly realized that I was not using the keyboard to do the development, it was much more practical on my PC with the SDCC 'C' compiler, but I used it more to interact with the program that I had loaded into the system.

Considering that it is entirely possible to write parts of code in Z80 assembly inside a 'C' program, I tell myself that it is much more relevant now to work in this way since this also allows you to become familiar with the 'C' language...


jeudi 2 novembre 2023

From the beginning, I hated the midi hardware infrastructure (II)


 And first of all, the typology of the pseudo MIDI network.What a horror this thing is...


The 'Barbie game' level! Cables everywhere, an assembly that looks like nothing. A chain going up and a single point to point going down. So we have to start by changing that!


And get rid of those damn 5-pin MIDI sockets that are useless to manipulate!


lundi 30 octobre 2023

vendredi 27 octobre 2023

8 ports MIDI to CV/Gate converter.

And now, the resumption of an old project for which I had not achieved the expected result.

I appreciate simple but effective designs. In this little game, however, I sometimes get fooled by choosing a component that meets the criteria of simplicity and functionality but which may present one or more small drawbacks that I think I can overcome with software.

Most of the time, this is the case. Sometimes, well, it fails miserably. In addition to wasting my time programming, sometimes I even have to abandon the concept altogether! This is the case for my previous version of this type of project.

All is never lost, you learn from your mistakes. And then we return to the subject, this time being careful not to fall into the traps typical of this kind of project. That's what I did here.

The image shown below is the second iteration of the basic concept. The previous prototype just served to validate my new concept.


This new study of a MIDI CV/Gate converter is more complicated than the previous version. There are more components. However, it's mostly 8 times the same type of CV and Gate outputs, with just the control processor. So, it's not very complicated actually.

However, I still improved the basic concept by allowing CV output of three types:
-5V ~ +5V; 0 ~ 5V; 0 ~ 10V.
Likewise, Gates outputs can be positive or negative.

I also added two potentiometers and two additional switches which will allow me to configure the device at a minimum. 

In fact, it's not a bad improvement. While I'm at it, I'm also switching from an ARM processor from STmicro to a RISC-V processor. I got used to these new processors pretty quickly. I have mastered them well and find them very practical to use.


The prototype was more condensed. This was not a good idea in my opinion because it did not allow practical handling of the device. The final version will therefore be larger

All that remains is to have the printed circuit manufactured and to test this new version.

mardi 24 octobre 2023

A TMS1122 Timer clone in a box.


The glorious era of the 80s


This venerable clock was programmable and allowed, thanks to 20 program steps, to control four outputs with an accuracy of one minute, over a week : gorgeous!

Personally, I have always appreciated the way this type of equipment works. An interface with buttons and a simple and clear display. A few minutes to understand how it works and voila!

So I recreated this type of clock but added some features including being able to program the start or stop of an output to the nearest second. This was woefully lacking on the original device.

Delay or advance can also be easily adjusted, which was not the case with the original machine. Here, there is no specialized circuit for time management. As originally, it is the processor that counts in real time. On the other hand, the precision is not based on the electrical main network pulsation but on the triggering of processor interrupts. As it is not clocked by a quartz, it is therefore relatively sensitive to temperature. In this way, the operation is identical to that of the TMS1122.

Some images of my new version of 'TMS 1122' :


The 16650 type accumulator allows operation with the display for approximately three days. Which is more than enough to compensate for possible power cuts. This time can be extended by putting the clock in 'ext' mode where less information is displayed, which increases the life of the accumulator.


CONCLUSION:


I must admit that the way the TMS1122 works was not at all easy to emulate. What was undoubtedly very 'easy' to achieve in assembler, is less simple in structured language like the 'C' used here. The functioning of the TMS1122 was certainly dictated by the obligation to work in assembler, with limited resources. Emulating the apparent simplicity of how the interface works was no small feat, far from it!

Offering a professional finish and easy to install product, is not easy either. But it's done. As presented, this programmable clock can be installed in a box and correctly manage its four outputs.

I plan to extend the capabilities of this timer in later versions which will improve the features already present and which will possibly offer others.

Stay tuned...

lundi 25 septembre 2023

Finally, my idea of ​​publishing all the progress of a project in a single post is not a very good idea. This makes the blog less dynamic and ultimately does not reflect the development activity as it really is. 

So I'm coming back to the form of publishing a post for major progress on a project.

I haven't posted anything for a few months now. I actually have several ongoing projects that are at various stages. The holidays forced me to take a break for a few weeks. In this generally gloomy atmosphere, you have to stay motivated and continue to 'think'!

dimanche 9 juillet 2023

BASIC-52

It's been a few months now since I subscribed to the Facebook group 'minimalist computing'. Personally, I believe more in this theme than in free software.

Why that? Because in absolute terms, free labor cannot exist. Whoever spends time studying a solution rather than cultivating his garden can only meet his basic needs through the intermediary of a a currency of exchange that he will have acquired thanks to his study and with which he will be able to obtain what he needs with people who specialize in this type of service :food; clothing; health etc. .

For me, there are three types of services:

  • Paid services at very high cost.
  • So-called 'free' services.
  • The 'intermediate' services at an 'affordable' displayed cost.

What do i mean?

As everyone knows, 'when the service is free, then you are the product'.


This is understandable when it comes to the sale of finished goods, but what about when it comes to services?
In fact, it is very simple. This involves considering the product in terms of a service (the IT solution), but also the resources needed to set up this service. 

From here, the three possibilities mentioned at the beginning of the post emerge.
  • The services or solutions that you will pay a high price for, will allow you to really improve your productivity. Quite simply by interfacing with a complex system by offering you a simple method of accessing it. You can then imagine creating your 'own' business because this interface will take care of all the aspects that are not the responsibility of the business application you want to develop. So you can focus on YOUR real work.
  • The so-called free services. Well they don't exist. In this type of business, you will often find the resources in open access. But the other part will be a mountain of documentation, very often disparate, erroneous or even contradictory. As your project evolves, you will be forced to find human resources who can handle different aspects that you did not originally foresee, as well as many other problems.
  • And finally the "intermediate" services which bring together aspects of the two previous offers. Namely that you will be led to finance applications at a certain price, supposed to provide you with simplified access services to what you wish to develop, but which will be voluntarily so disparate, so poorly documented, so unmanageable that in the end, you will still have to create a team to study your project.
To image everything, the first type of service will provide you with CAD software, for example, which will allow you, after having studied it, to easily develop mechanical parts, for example. The entry parameters in the business are simple: the price of the solution and the time you need to understand it. If you are an experienced person, you will be able to assess the situation.

The second type of service, the free one, is also very simple: You are in front of the Himalayas, you are not a mountaineer at all and you want to go to the top. Basically you want to create something around Linux, because it's free: good joke! The Sherpa will know how to be paid dearly for his help. In this case, it's very simple, you are good for the asylum. But there are people who are motivated by the impossible, even in full consciousness, so...

And the third solution: the most cynical. Yes, because it will make you believe that by paying for an environment that is not very expensive, you will get the expected service. Of course, for me, excellence in this area is Microsoft. You will pay for a solution, which will quickly lead you to see that your project cannot be built and will require you to form a team of experts. 

Whereas in the two previous solutions you can 'play' in full consciousness, i.e. you pay dearly and possibly you even take credit for it, but there is a strong probability that you will reach the end, or else you will not pay nothing, but you're young, have a lot of time to waste and are ready to live 10 years with pizzas...

...as much in the third solution, the worst, you pay, with your savings, you are forced to surround yourself as your project evolves, and you realize that in fact you will never deliver the customer on time because everything is done so that you cannot assess the workload required to develop your solution. In fact, it's the best business tactic to nip any possibility of competition in the bud. microsoft is not the only one to work in this way. In general, all the companies at the top of the Nasdaq operate like that: smoking and 'easy' access to the offer, then, when the fish has bitten, we strike and there, it's dead. Either you pay if you can afford it, or you die. Usually you die. The American way actually...

So... Arrived here, what solution is offered to you if you want to develop something? I would say, a key word: simplicity.

Back to basics, ie using simple but effective technologies that you can easily master on your own and whose cost, in terms of learning time or money invested, remains within the realm of reasonableness. Reason why I appreciate the notion of minimalist computing. This is also the reason why working this way is for many, working the way of the 80s.

I wrote well to work "the way of"... Because with the systems accessible today, the performances have nothing to do with those of the 80s. For example I am currently working with a small RISC-V microcontroller 32 bit at 144MHz. How does that compare to a microcontroller from the 80s, like the 8031 ​​for example, delivering a painful 1Mips at 11MHz?

And I come to the 'profound' reason for this post. Namely the implementation of the basic 8052 on a fast microcontroller. In fact I already made this type of implementation in the early 90s on a Dallas DS80C320 processor. This processor is about three times faster than an 8031 ​​at the same frequency, and is able to run at 33MHz, which results in nearly 10 times faster than an original 8031 i.e. the equivalent of a basic 8031 ​​but at 100MHz

'What the fuck'? Today, an 80C320 at Mouser is $20.62 : oh my god!!!

STC, a Chinese company, manufactures 8031-type microcontrollers with 1T architecture, ie the majority of instructions are executed in 1 or 2 clock cycles. That is twice as fast as the DS80C320. It is capable of running at 33MHz, the equivalent of a basic 8031 ​​but here at 400MHz, and can be found for around $1.30. 

Okay, 400MHz is an impressive number, but that's just to give a clock comparison to the original 8031. If you divide 400 by 12, you get about 33MIPS. Inevitably, almost 1 MIPS per MHz, at 33MHz, that gives 33MIPS. To be realistic, it's probably less than that since some of the instructions are executed in 2 clock cycles.

It should be checked at runtime, but let's expect 20MIPS at 33MHz, this gives a basic interpreter 20 times faster. This is not nothing, knowing that the BASIC-52 interpreter already works well on a standard 8031. Hence the temptation to implement BASIC-52 on this STC processor, in this case an STC12C5A60S2.

Yes, because it's much more fun to go on this kind of adventure than to spend hours looking at uninteresting Facebook pages!

So why this particular STC12C5A60S2. 

  • Because it contains onboard flash.
  • Because it contains on-board RAM.
  • Because you can find cheap development boards.
  • Because it is programmed very easily by its serial port n°1, thanks to the software available from STC.

The dev board ordered.


The dev board received & the Dallas DS80C320


The programing software


All this to get to this:


The previous image would try to think it works. In a sense yes. In fact, I have a problem accessing the RAM memory. I cannot record Basic lines. The input goes well but the LIST statement does not list anything. I can no longer assign a value to a variable. I clearly have a memory access problem.

However the interpreter starts well, tests the available memory well and moreover displays it correctly. The interpreter requires 1KB to run, which it is. I haven't researched the problem yet.

Because the objective of this Sunday afternoon was simply to see if I could establish a connection with the interpreter on an 8031-type microcontroller, which therefore does not have all the resources of an 8052-type component.

But STC had the good idea to propose a baud rate generator instead of the timer n°2 only present in the 8052 type components. It was therefore enough to code the initialization of this generator in the source code of the version 1.3 of the Basic interpreter to successfully establish the connection and see that it works.

What else needs to be done to make it work well. And well find the reason why the RAM is inaccessible. I haven't looked in detail at the changes that were made to version 1.3 of the Basic-52. I know that there is a detection of the type of processor that I removed to have the place to put my initialization code of the Baud Rate generator. I suspect 'stuff' must be happening in this piece of code.

If I can determine the problem, I will also have to review the EPROM programming instructions. Because in fact I intend to make a small card equipped with a FRAM type memory. In this case, only the EPROM 'type' memory transfer instructions would have to be kept.

In short, it's a fun little subject for Sunday afternoons. Despite the 'fun' aspect of what I have just described, this system, which I could operate at 33MHz, could provide very good performance while offering disconcerting ease of access both in terms of financial cost and knowledge term. That's what I call the fourth way!

The fourth way : financially affordable, easy to use, very good performance, very good durability.

lundi 26 juin 2023

A downloadable MSX cartridge.

After having studied a universal timer based on the operation of the TMS1122, and while waiting to receive the printed circuits board of the definitive version, it is time to continue the study of the MSX cartridge.

The reasons for this type of cartridge: I knew absolutely nothing about the MSX stadard. Out of curiosity, I mounted an MSX board developed by Sergey Kiselev :

https://github.com/skiselev/omega/blob/master/Mainboard.md

This MSX computer works very well. However, the problems started when I wanted to test an application, typically a game. Which cartridge to insert since I don't own any original game cartridge?...

I tested several 'universal' cartridges like the Carnivore 2 witch was defective, the Rookie Drive NX which is supposed to emulate a floppy drive and the MegaFlashROM which is the one I managed to use. 


The common point of these cartridges is that they are not at all easy to use. Most of the time, it's a matter of copying the desired program to an SD card and then inserting this SD card into the cartridge. When starting the computer, it is then necessary to press keys at certain times to access the menu of the cartridge, allowing the program of the SD card to be recognized by the MSX computer, most often by copying the contents of this SD card in a memory space addressed by the MSX computer. It works, but it's anything but practical. And to consider development, it's downright impractical, hence the presence of MSX emulators for Windows for example.

So, I decided to try creating a cartridge that would work like a memory emulator. That is to say that the memory of the cartridge could be loaded from a PC and directly accessible by the MSX computer after RESET. Simple in fact!

Note that with this project, I have no idea where I'm going. I have never programmed the USB interface of the processor used (always RISC V). My experience with USB dates back a few years when I created a MIDI multiport using an STM32 processor. For now, I have created an MSX cartridge and have just implemented the few components needed to make the microcontroller work.


This is the 3D representation of my cartridge and...


This is the hardware realization with just the necessary components to go on the adventure. The first step will consist in programming the microcontroller to behave like a mass memory then to use part of the internal SRAM as memory accessible by the PC.

This is already a nice challenge I think...


vendredi 31 mars 2023

Retro-computing : TMS1122NL

Until today, I used to post topics in no particular order. As a result, a project was sometimes scattered over long periods of time on this blog, except for my repair of the Korg T1.

I published on Facebook a few days ago a photo taken of a printed circuit board that I intend to emulate one of the first microcontrollers, namely the TMS1122, a circuit from the 4-bit TMS1000 family from Texas Instruments.

I was asked if I had a blog on the development of this circuit in order to follow the construction. Hence my decision to make dedicated articles. I will see in time if it suits the form of this blog.

So :

- 03/31-2023 'A small project around the TMS1122'.
- 05/05-2023 'What... since the last publication'.
- 06/07-2023 'What... since the last publication'. 
- 06/18-2023 'The prototype is approuved'. 

A small project around the TMS1122

Why such a project?
In fact, a very long time ago, I made a device around this circuit. It was in fact my first 'processor' based achievement, in 1983. I was so impressed by this system that I kept very good memories of it and the desire to use again the same concept for years.

But what does this TMS1122 do? 
It is quite simply a 4-output weekly programmable clock.
And that's all?
Yes, but he does it very well. Its simplicity of use is disconcerting.

Let's go, what can such a clock look like?


The image is taken from a scan of a French magazine: Electronique Pratique. It is this clock that I also made and used for years: not very sexy!

Presented like this, we realize that the device is quite bulky. We also note that the front panel has many keys plus LEDs and 7-digit displays. The 4 outputs are available on the rear face to supply power (mains) to 4 devices.

Aspects that I find a little annoying: the size; the obligation to connect the 4 devices directly to the clock case without the possibility of a remote control; the display that does not manage the seconds. This last point is important because it can be interesting to put a device in operation for only a few seconds.

The interesting aspects: a clearly readable, simple display which indicates absolutely all the necessary information. A sufficient number of buttons to manage the device without having a headache, even without instructions.

The goal of my realization is therefore to reproduce this clock but by removing the disadvantages and adding the functionalities that I think are absolutely necessary.

Of course, the TMS1122NL is no longer available today. And anyway I could not use it since it does not have the management of seconds, which I absolutely want to implement. Incredible, according to WikipediA information, about 26 million of these circuits, TMS 1000, were sold by T.I. per year, from 1974 to 1979, or 130 million! The TMS1122 being a TMS1000 version programmed to be this famous 4-output clock.

TMS1122NL, the brave!

This raises the question of processor emulation, or application emulation. In fact the question does not really arise. Even if I emulated the processor, since I don't own the application binary because it is factory-written in the circuit, I couldn't run this binary anyway. (Or else, help from a veteran of T.I. who would have the binary in question...)

It is therefore a question of recreating the operation of this TMS1122 programmed to be a clock, on a totally different system. Consequently, the question of the choice of micro-controller arises. There are a multitude of possibilities, in particular the circuits of the ARM type, which I use regularly, or others... I've used many different types all these years. This time, I decided to try the adventure on a relatively new type of processor, namely a RISC-V, In this case, a CH32V203C8T6 from WCH. It's trendy, I know...


Without further ado, here is a three-dimensional view of what I will try to achieve and make it work:


As you can see, the size of this circuit is much smaller than the bulky machine presented at the beginning of the article. Also, there only seem to be two ICs on this design. And you are not wrong. No transistors or other logic circuits either. In fact, the small integrated circuit is an integrated real-time clock. So apart from the processor and the clock circuit, there is no other active circuit on this circuit board. Compared to the original TMS1122 design, will it work?

The original design, provided by T.I.


My design:


My schematic is very different but it contains all the elements of the original application as proposed by Texas Instruments. All switches, LEDs and displays are present. And here, not only 4 7-segment displays, but 6 since it is planned to display the seconds.

At this point, I don't know if this schema is valid. I don't even know if I wired the right signals for programming the processor. I did some tests with a study board that I previously purchased, but despite the fact that I managed to program the processor of this study board the same as what I plan to do here, a doubt remains, which I have not been able to dispel with the documentation. I'll see...

A few days later!

First I mounted the whole board. I started with the processor to verify that I could access it using the programming dongle and the development environment. It has been. So I placed the rest of the components, and this is what it looks like:


On the other hand, what I had anticipated about the programming pins of the processor turned out. I use some inputs / outputs of the processor to control elements, LEDs, buttons. However, some outputs used are also dedicated to the debug port. It is therefore necessary to deactivate this function within the processor to be able to use these I/O as such. In doing so, the possibility of placing the processor in debug mode using the external dongle is deactivated. So I had to connect two switches to the board to put the processor in the right mode using a hardware RESET.
This is the reason for the 4 wires soldered to the board.

Programming the system is not very easy. To simplify the hardware to the extreme, I used very few components, so no buffers, no transistors etc... I also routed the board so that the tracks are the easiest to route, with a minimum of vias.

All this implies that everything must be managed by software. So it took me some time and some headaches. Because in fact I was also discovering this processor. The development environment does not have a graphical interface like that of STmicro to configure the hardware resources of the processor. Everything has to be done 'by hand'. On the other hand, and thanks to the many examples provided, this way of doing things allows you to know very precisely how the processor works, which is not necessarily the case when everything is 'hidden by a nice graphical interface.

Where am I today?

Well, all inputs/outputs are functional. Communication with the real-time clock works well, but it was no fun hand-programming a half-duplex SPI port on a single I/O. Basically, the SPI bus of the processor always uses two distinct I/O. The management of the keyboard works very well, which was not necessarily the case with the TMS1122 or the bounce of the switch contacts was not correctly treated: many false bounces and therefore a somewhat delicate entry of information. I also finished the behavior of the system when entering information.

It now remains for me to create the command interpreter which will have to execute either the orders directly, or place them in the database. Then to realize the scheduler of the database, which will be responsible for the realization of the programmed actions.

On to the next post...

> 05/05-2023 < What has been achieved since the last publication.

Well, database management has been completed. All the functions necessary for the final construction of the program are now established. There will probably some modifications to be made because during development, I realized that I could make some operational improvements.

I also made a front face for this application. I just received it. I must say that for a test shot, the rendering is quite correct:


I still have to find a plastic film to improve the contrast of the LED displays.

In order to keep the project small, I split the construction into two parts. The first, the one presented to you, manages the user interface as well as all the functions of the clock. However, neither the power supply nor the inputs/outputs are present. This is the subject of the second part of this clock, here:


This part will mount directly to the back of the main board. It contains everything you need for a backed up power supply as well as different types of I/O including the 'famous' relays present on the original TI concept. I added some specific inputs/outputs to make this part of the construction as flexible as possible.

I also think I can use this part in a different implementation of the TMS1122 concept, I think using a graphic display.

What remains to do to 'practically' finalize this project: the re-writing of the firmware in a stable version, the actual realization of the I/O board and its test. It still represents work.

> 06/07-2023 < What has been achieved since the last publication.


Well, I rewrote the entire system program. Indeed, the first draft consisted in checking the software feasibility corresponding to the hardware options that I had implemented.

Once this verification was validated, I first had to improve the sub-parts corresponding to the various hardware implementations. On the other hand, I also modified the general functioning, namely that absolutely everything that happens is managed by interrupts and no longer in a main loop reacting to various semaphores coming from multiple interrupts. Finally, I also added some features that are not original in the TMS1121/1122 in order to improve the general workflow.

I just have to check the general operation of the system and correct any bugs. But it will now be much simpler with the new software architecture.

In addition, I received the power supply/relay board as well as the screws necessary for the general assembly. I have not yet tested the power supply board but have already assembled the assembly to check if all the dimensions were respected.

It fits very fine :


I had planned to mount it in a Euro Rack type box. This type of rack is elegant and highlights the general appearance of the TIMER, here next to a Behringer module. Of course, in the case of mounting near a PLC box, this Timer can be mounted in a specific box.

I placed a few too many screws for my taste. I still have to check if the keyboard works as well with fewer fixing points. I also have the screen printing to be improved. All these adjustments will be made on the final version which I hope will be available within a few weeks.

I am also testing the power/driver board. It attaches to the back of the Timer board. Here is what the final assembly looks like:


The Timer is designed to work for a certain time, even in the event of a power cut. This board will also eventually receive some serial links to allow the Timer to communicate with different peripherals. I plan this for a future version. I only assembled some of the components because it is only a prototype for the moment. Everything seems to be working fine...

Even if it is a relatively simple project, I admit that it still takes time when you want to do well and you have to manage all the aspects of such a project. But hey, that's also what's interesting...

> 06/18-2023 < The prototype is approuved!


The two-way communication between the clock card and the input/output card works perfectly well. I can now check the battery status directly on the front panel.


About battery, the whole system is able to run at least three whole days on the 16550 battery, relays not activated in this case. Which is more than enough for 'normal' use of this type of equipment. From memory, the original version, equipped with the famous TMS1122NL, was just able to run about a day with two 4.5V flat batteries in series, and even then, on condition of turning off the clock displays. Whereas in the case of this new version, the displays constantly show the time.

It only remains for me to make the few adjustments that I think should be made on the printed circuit boards as well as on the front face to propose the final version of this clock.

As a reminder, this clock is extremely easy to use and in the current version, offers 4 programmable outputs over the week. 40 program steps are available, which doubles the capacity of the original TMS1122NL based clock. Once this device is really finished, I plan to study various extensions that seem interesting to me to integrate, such as temperature control and other kind of measures ...